
Prey '96: Energy Monitoring Station

Today we’re going to talk a little about Tom Hall’s iteration of Prey. This one’s a little more in-depth than usual, so prepare for a lot of analysis here.
If you’re not familiar with the development of Prey then here’s a very quick explanation.
Development originally began in 1995 at 3D Realms by the team responsible for Rise of the Triad (awesome game, please check it out) and continued until the middle of 1996 when key members, such as Tom Hall, left the team.
Not long after, around October of ‘96, Paul Schuytema was brought in and headed up development until near the end of 1998 when once again key members of the team departed, this time including William Scarboro, the lead programmer on the project.
Determined to continue the development of the game in-house, in November of the same year, 3D Realms pulled in Corrinne Yu, who had just left Ion Storm, to continue developing the technology behind the game in silence (for the most part).
Corrinne Yu eventually left 3D Realms and the game was handed over to Human Head in 2001, who opted to use id Software’s then new Doom 3 engine instead, rather than developing their own tech, and taking much inspiration from the iteration of the game developed during Schuytema’s lead on the project.
And as you should already know, Human Head then successfully completed the game and it was finally released in July of 2006.
I consider these three separate eras of development as the Tom hall era, Paul Schuytema era and finally the Chris Rhinehart era. I don’t count the period that Corrinne Yu worked with 3D Realms simply because this appears to have been more focused on the technology and less so on the game itself.
The Energy Monitoring Station was one of the areas to be featured in Tom Hall’s incarnation of Prey and was first formally revealed on 3D Realm’s Prey development diary on the 19th of April, 1996.
The purpose of the area is currently unknown but it can be assumed that it was to be a facility on the alien world which managed the distribution and routing of energy. Thanks to Prey’s development diary, we know that the facility would have been made up of a control room, an energy core, an auxiliary control room and an energy cell room.
Unlike other areas intended for Prey ‘96, the EMS made several appearances throughout Prey’s development diary, which gives us a good glimpse at several spaces intended for this area of the game and their evolution.
Control Room
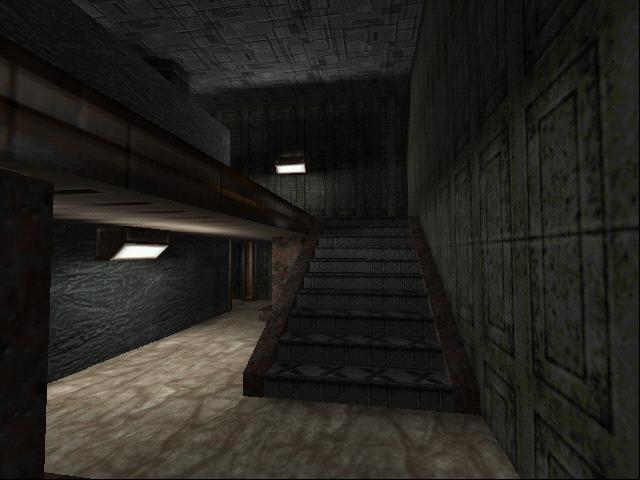
On the 31st of May, 1996, the Control Room of the EMS was revealed.
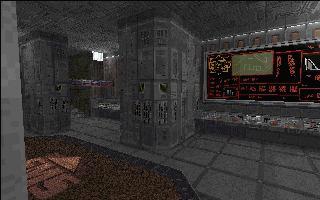
The screenshot provided shows a large room with a number of control panels and a large display on a wall. The display itself is quite difficult to make out but appears to be placed on a panel that’s slightly pronounced off the back wall.
On the display we see a number of strange markings in red, some in yellow, some in green and some at the right edge in white. Whether some of the markings are text or something else entirely is unfortunately hard to discern from the screenshot, but from the area we could guess it’s more than likely these are various charts and graphs regarding the status of the station.
Beneath the display we can see a large panel that also appears to pronounce itself away from the back wall - this is more than likely a control panel. It also seems to appear on the left side of the center column.
On the floor to the left we can see the letters ‘EMS’, and what appears to be an arrow directly above the letters. The letters are very likely to indicate that this is the Energy Monitoring Station itself, though the arrow seems to infer that there is an entrance out of sight and that entrance is leading _into _the EMS.
As a side note, the fact that the text on the ground appears to be using English characters seems very unusual given that this was, from my understanding, an alien world - this was either something the developers overlooked or indicates it was a placeholder.
At the far back, it looks like there are a set of steps leading upwards and a large conduit on the wall that follows up the stairs.
If we were to lay out the entire Control Room and see it from above, it would probably look something like this.
This is a very rough mock-up I’ve produced for the layout of this room. The glow from each light visible in the screenshot gives us a vague idea where there may be some walls just out of shot, but all in all, there’s really not much to see.
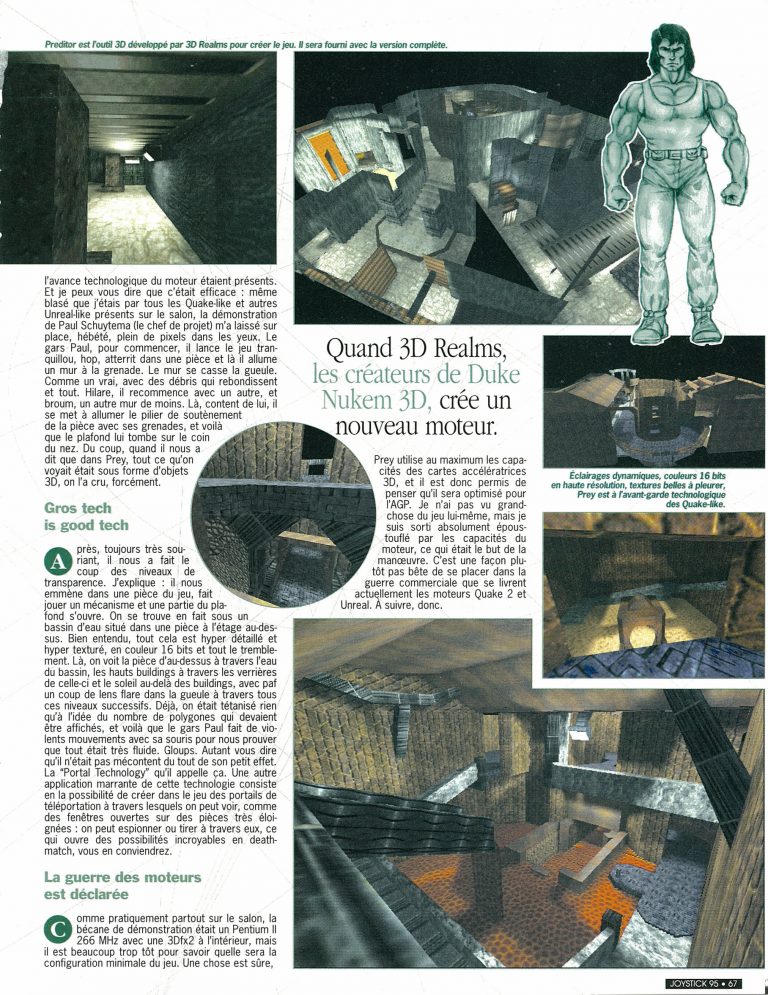
In the screenshot provided below, which was published in Joystick magazine, I’ve pinpointed where the Control Room was located in relation to the rest of the level.
The copy of Joystick magazine this shot was taken from was actually published in 1998, so a considerable time following the end of Tom Hall’s iteration of the game. However, I would place the screenshots at some point in May 1996, judging from the other screenshots on the Prey development diary.
I’ll provide the complete pages of the Joystick article at the end.
This particular screenshot appears to show the Control Room with different textures that seem to lack any of the detail we saw before; it almost appears to be in an incomplete state which does appear to imply it was an earlier iteration of the map
The fact that the geometry appears to have changed very little follows what was apparently the typical process of the team, who would complete the geometry and lighting before handing it off to the texture artists.
Here’s what the start of the level design process looks like: the hallways and rooms are made, a couple lights thrown in, ordinary textures just to have something on the wall. Soon specific art will be drawn, some nice details around the doors, places set up for items, and so on. […]
Joe Siegler, 1996-04-19
This screenshot also confirms that there were indeed a set of stairs leading up at the back of the room, which appear to lead into the area seen in the screenshots below.
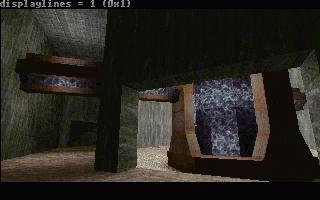
Energy Core
One of the other sections that the player would find within the EMS would be the energy core itself, which was a large circular object of which was intended to have some glowing energy inside it, carrying all energy through the facility via large tubes.
Several revisions of this can be seen below, showing the evolving geometry and textures being used for this part of the map.
The player’s interaction with the energy core isn’t known, but it seems to have been quite an important section of the level due to the focus on its design.

 Unique textures have now been introduced for the Energy Core.
 Some further refinement, including some new textures for the floor, walls and ceiling.
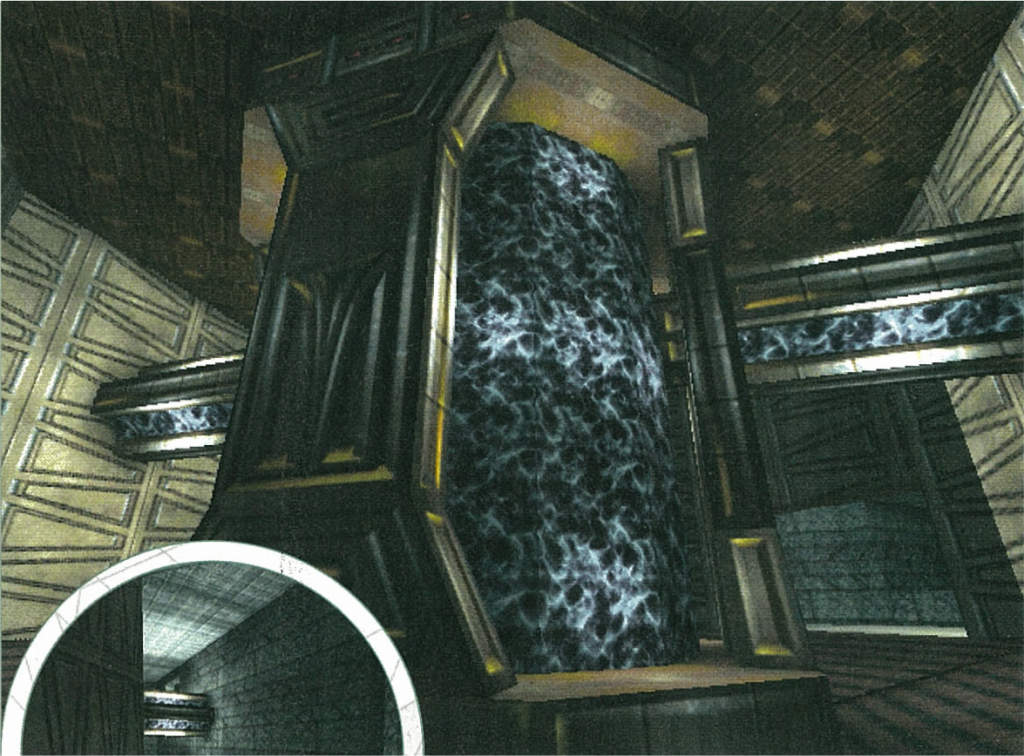 This appears to be the very last iteration of the map shown to the public, featured in Joystick magazine.
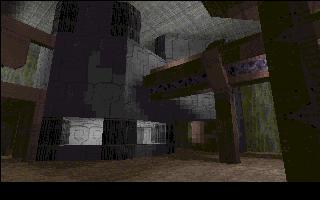
As you can see, the earliest screenshot for the Energy Core shows us the open space with an entrance that the core occupies, which is surrounded by a corridor that the player could travel around. The Joystick magazine also provides us with a screenshot showing this outer section from a later build of the game
Surprisingly, the geometry for the core itself (and the pipe beside it) appears to have changed very little.
The core appears to be slightly lower than the rest of the ground, with a ramp surrounding it, though this might just be due to the way the screenshot was taken. However, it would certainly offer a nice variation to the rest of the geometry.
According to an update made on Prey’s development diary on the 3rd of May 1996, the Energy Core was to eventually feature animated textures representing the energy flowing within the core itself.
A few more textures and the core of the Energy Monitoring Station is looking better and better. Next up: an animated energy texture instead of this old blue one […]
Joe Siegler, 1996-05-03
Sadly, this was never shown publicly in any capacity, we can’t even be certain if this made it into Prey ‘96 before its demise, but this piece of information is interesting non-the-less as it does reveal that animated textures were intended to be a supported feature in Prey’s engine.
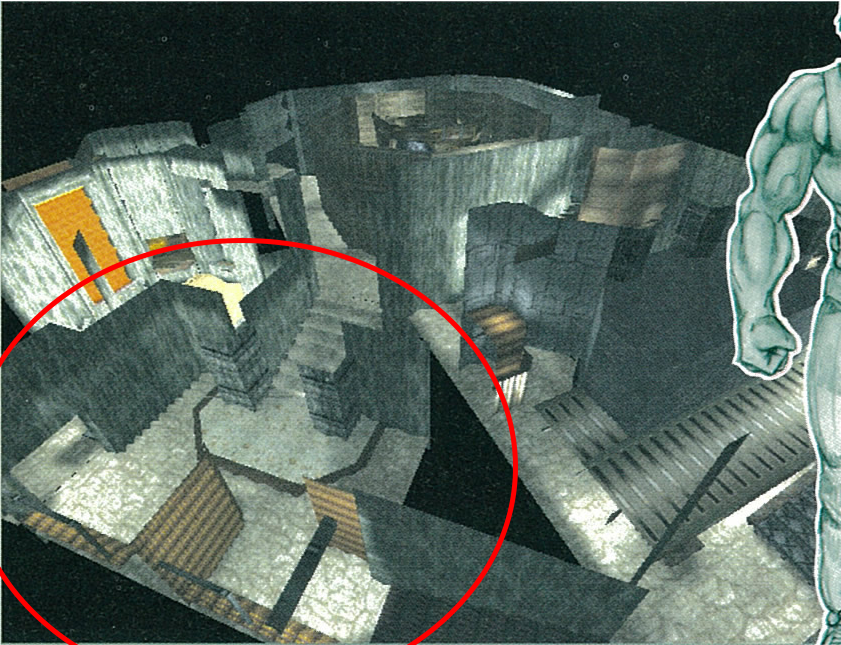
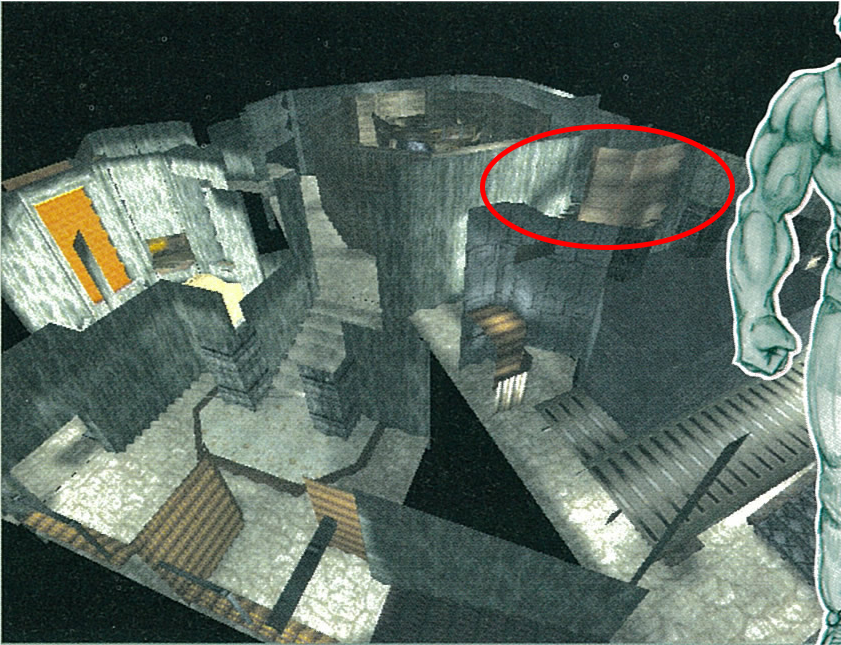
In the screenshot provided below, I’ve circled the area in which the core occupies in relation to a larger portion of the level.
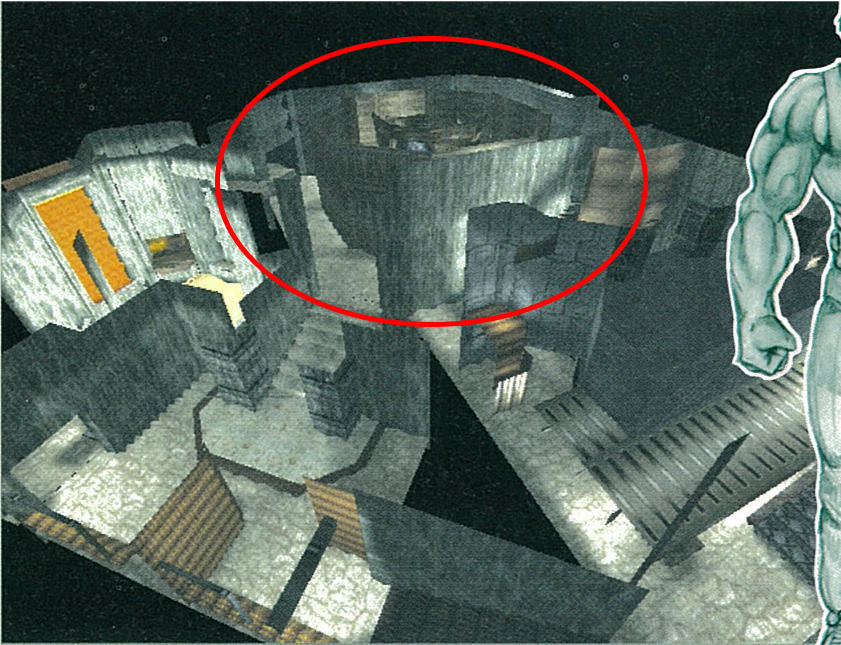
As you can see, the core was located just a short walk away from the Control Room, which we saw previously.
Reactor Room
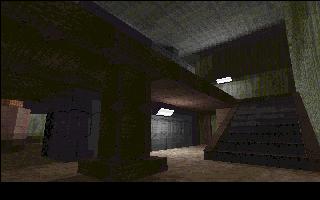
The Reactor Room appears to have been a largish/open room in the EMS, though it doesn’t appear to have an obvious function other than serving as an area the player passes through.
 An earlier iteration of this area.
 Screenshot provided on the 24th of May, 1996.
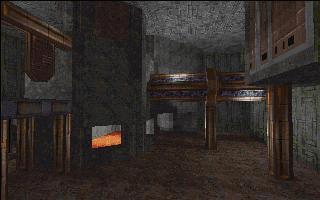
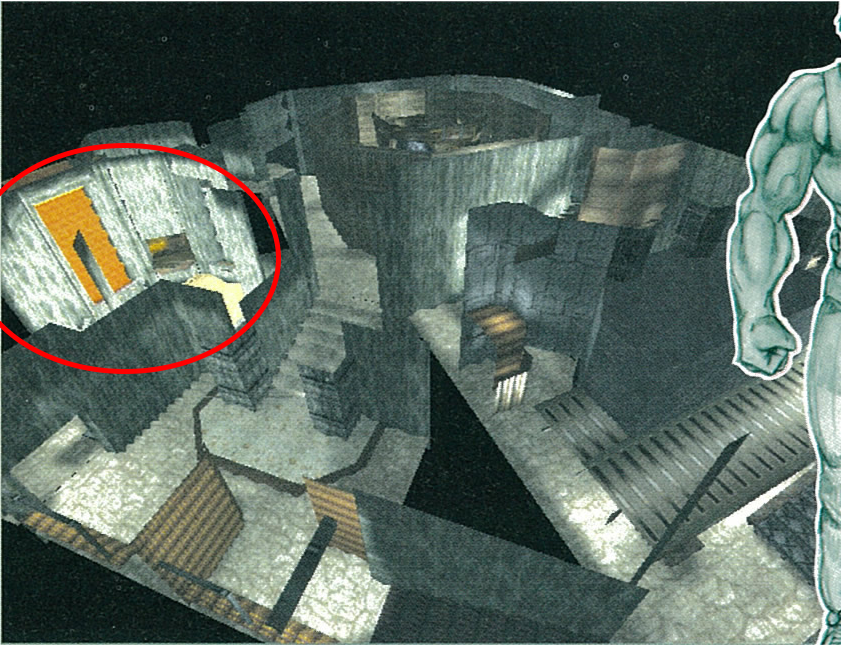
From the second screenshot provided in May, there appears to be a strange orange texture located within the room we can see, it’s very plausible this was there before but was simply out of shot.
Judging from the large pipe, what appears to be the same as the one in the Energy Core room, it’s very possible the Energy Core is either located within or adjacent to this area, though it was initially difficult to determine for sure from the screenshots.
I wanted to figure out where this room was in relation to the others that were visible in the Joystick screenshot, and I’m sure you’re just dying to know. Well, let’s take a look at the following screenshot which was from the same area.

If you’re wondering where this screenshot was taken in relation to the others, I’ve highlighted it below.
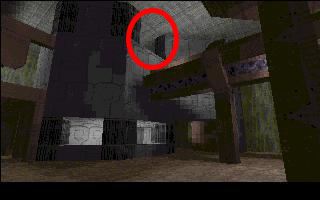
We can actually see this in the Joystick screenshot, I’ve highlighted it below.
So now we know where the Reactor Room was located in relation to the other rooms we’ve looked at thus far—this would have meant that walking up the stairs at the back of the Control Room and then taking a left turn would have then taken us straight into the Reactor Room.

Energy Cell Room
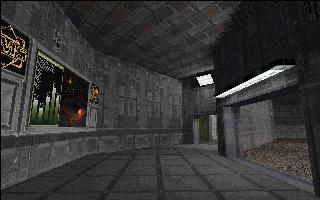
Unfortunately for this one it seems like only a single screenshot was ever shared publicly.
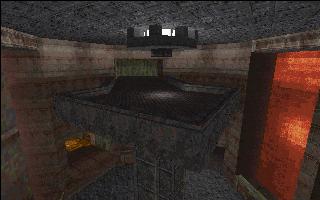
Here’s a shot of a platform above the energy cell room. Waiting for the real energy cell graphics, and a few more specific textures. There’s only one more room in the Energy Monitoring Station, and that’s the fusion pool that you can barely see through the lower left doorway.
Joe Siegler, 1996-06-21
On the Joystick preview, I unfortunately can’t be 100% adamant where this is located in relation to the other rooms, however there appears to be a very similar room located just down the opposite hall at the back of the Control Room which I’ve highlighted below.
The platform featured in the screenshot provided in June is missing but it’s very possible that at this point the geometry simply hadn’t yet been completed for this area of the level or the platform was just a later addition.
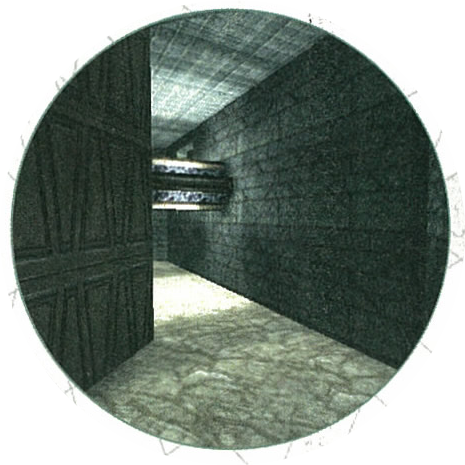
Auxiliary Control Room
Like the above, very little was ever shown for the Auxiliary Control Room, however, it appears to be similar in visual style to the Control Room.
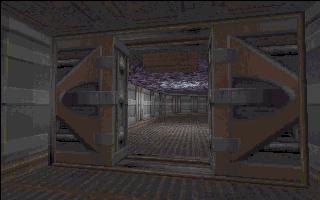
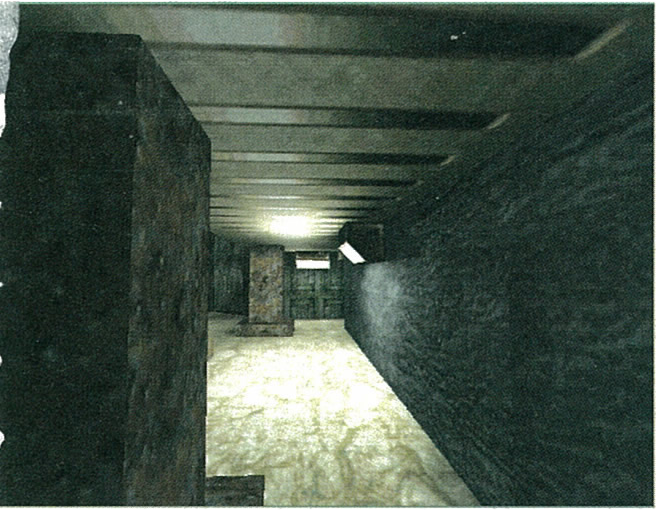
This is the dark access tunnel between the auxiliary control room and the energy cell room. This heavy door can be opened “elsewhere”. The bottom of the plasma core emits a cool glow.
Joe Siegler, 1996-06-28
The description provided above by Siegler almost suggests that it may be part of a lower section in the facility, which is very possible as we can see lower sections in the screenshots provided of the Energy Cell Room which is apparently where this tunnel leads to or from.
It seems very odd that the texture for the ceiling past the gates seems to be the same as that used for the Energy Core, it’s very likely this is what Siegler was referencing by ‘[…] the plasma core emits a cool glow […]’ but it seems unusual that it would be exposed like this. Maybe the aliens just had very poor health and safety standards.
 Screenshot provided by Siegler on the 14th of June 1996.
When looking at this other screenshot, which is described simply as the ‘Auxiliary Control Room’, we can see that the larger doorway seems to lead into a large area; could this be to the lower section Energy Cell Room? From the few screenshots we have showing the Energy Cell Room, there do appear to be several entrances on the lower floor.
There appears to be several panels we can see on the wall here displaying graphs and some other oddities - the panel to the right of the graphics almost looks like it’s displaying a colourful scene of space?
To the left of the graph on another panel we can once again see English initials for ‘EMS’, again this was either an oversight or simply temporary art, but this time it appears to be designed in the form of a logo.
Unfortunately for the Auxiliary Control Room, there doesn’t appear to be much else we can see or piece together.
The End?
That should be it for the monitoring station for now, but as always, let me know if I missed anything. Below are the Joystick pages in full which show unique screenshots and concept art—very cool!

Overall, I think the EMS is more compact than I expected from the screenshots, however, this does depend on the player size and movement - by studying the screenshots further it may be able to figure out a rough scale, however, the player speed at this point is probably going to remain a mystery for a long time.
I plan on writing more about Prey on here, as I don’t think I do it often enough considering the theme of the site, so expect more in the future.
If you want to give any feedback or get in touch, feel free to reach out on Discord. I’m never too sure if I’m writing things that people enjoy or perhaps being too wordy, so feedback is really appreciated.